Happy Holidays. We had a wonderful gathering for Christmas dinner here in our house. I love to cook and prepare meals and to do so in our home was a treat. Our meal was a gathering of family and friends who were also staying in town for the holidays, and this made for a fun and eclectic group with new conversations and connections. We prepared squash soup, pumpkin pie, and the centerpiece: a smoked ham roast. Our guests brought delicious side dishes and desserts featuring many local farms (North Country Creamery, Mace Chasm Farm, Sand River Community Farm, Juniper Hill Farm, Echo Farm).
The ham was such a hit that I want to share with you what I learned cooking and preparing the roast.
The ham roast appeared on our holiday menu due to the broken seal on a large ham roast package in the farm store, and a desire to perfect and hopefully share a great ham roast recipe.
I love to talk about food, how we grow food, how food contributes to our health, and of course how to prepare it! Over the past few weeks I have plugged the holiday ham roasts a few times and I realize I struggle to promote a roast that I am not confident how to cook. And so it was decided, ham roast was on the menu. I gave myself extra research time to understand what makes a ham roast turn out dry and tough and therefore how to curate that moist and delicious ham roast we all hope for.
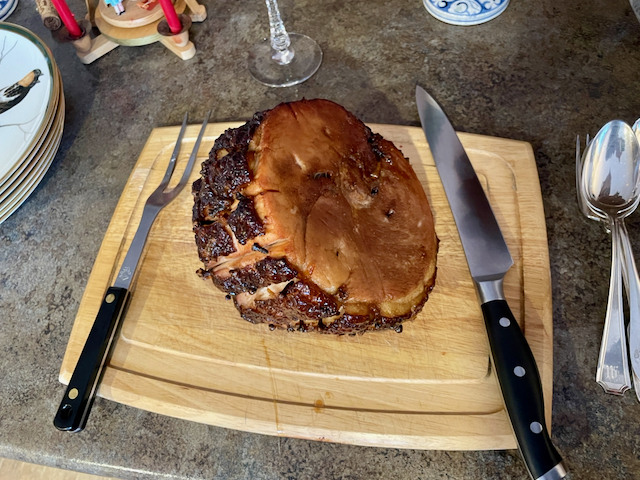
The roast turned out perfect, and we all raved about it! The ham roast was the simplest and easiest of the holiday roasts (not counting the hours of research!). I highly recommend it, expecially if you have a lot of other prep work to do the day of the meal. Here’s what I learned and the simple recipe/process for cooking one of our No-Nitrate Smoked Ham Roasts.
Preparing a Smoked Ham Roast
I use the word “preparing” because a ham roast is already cooked and safe to eat. This is important to keep in mind. My first few tries at this roast treated it as such: a roast. Throw it in the oven at 350F and cook to 140F (a good pork internal temp). However, this approach yielded unbearably dry and tough ham eating. One thing I noticed in previous attempts was that the roasting pan ended up full of yummy, smoky drippings, which made a delicious sauce, but was not enough to remedy the ham itself.
Upon reading numerous recipes and articles on how to cook a smoked ham a few details resonated with my own understanding of cooking and preparing meat:
- The ham is already cooked, so our goal is actually to warm up the roast and release the juices into the meat, but not so much that they leave the roast and end up in the pan. Noted: less juices in the pan the better.
- The ham does not need to get to 140F since it is already cooked. Reaching an internal temperature of 120F is adequate for taste and texture. Noted: cook to 100-110F and let rest for 30 minutes.
- 350F was too high an oven temperature, 200F seemed like it would take too long, and some research showed that 250F would not release excessive moisture. Noted: set oven to 250F.
Recipe for cooking a Smoked Ham
- Thaw roast for 48 hours in the fridge. (If you’re crunched for time, set the roast out on the counter the night before roasting).
- Let roast come to room temperature. Approximately 90 – 120 minutes.
- Preheat the oven to 250F
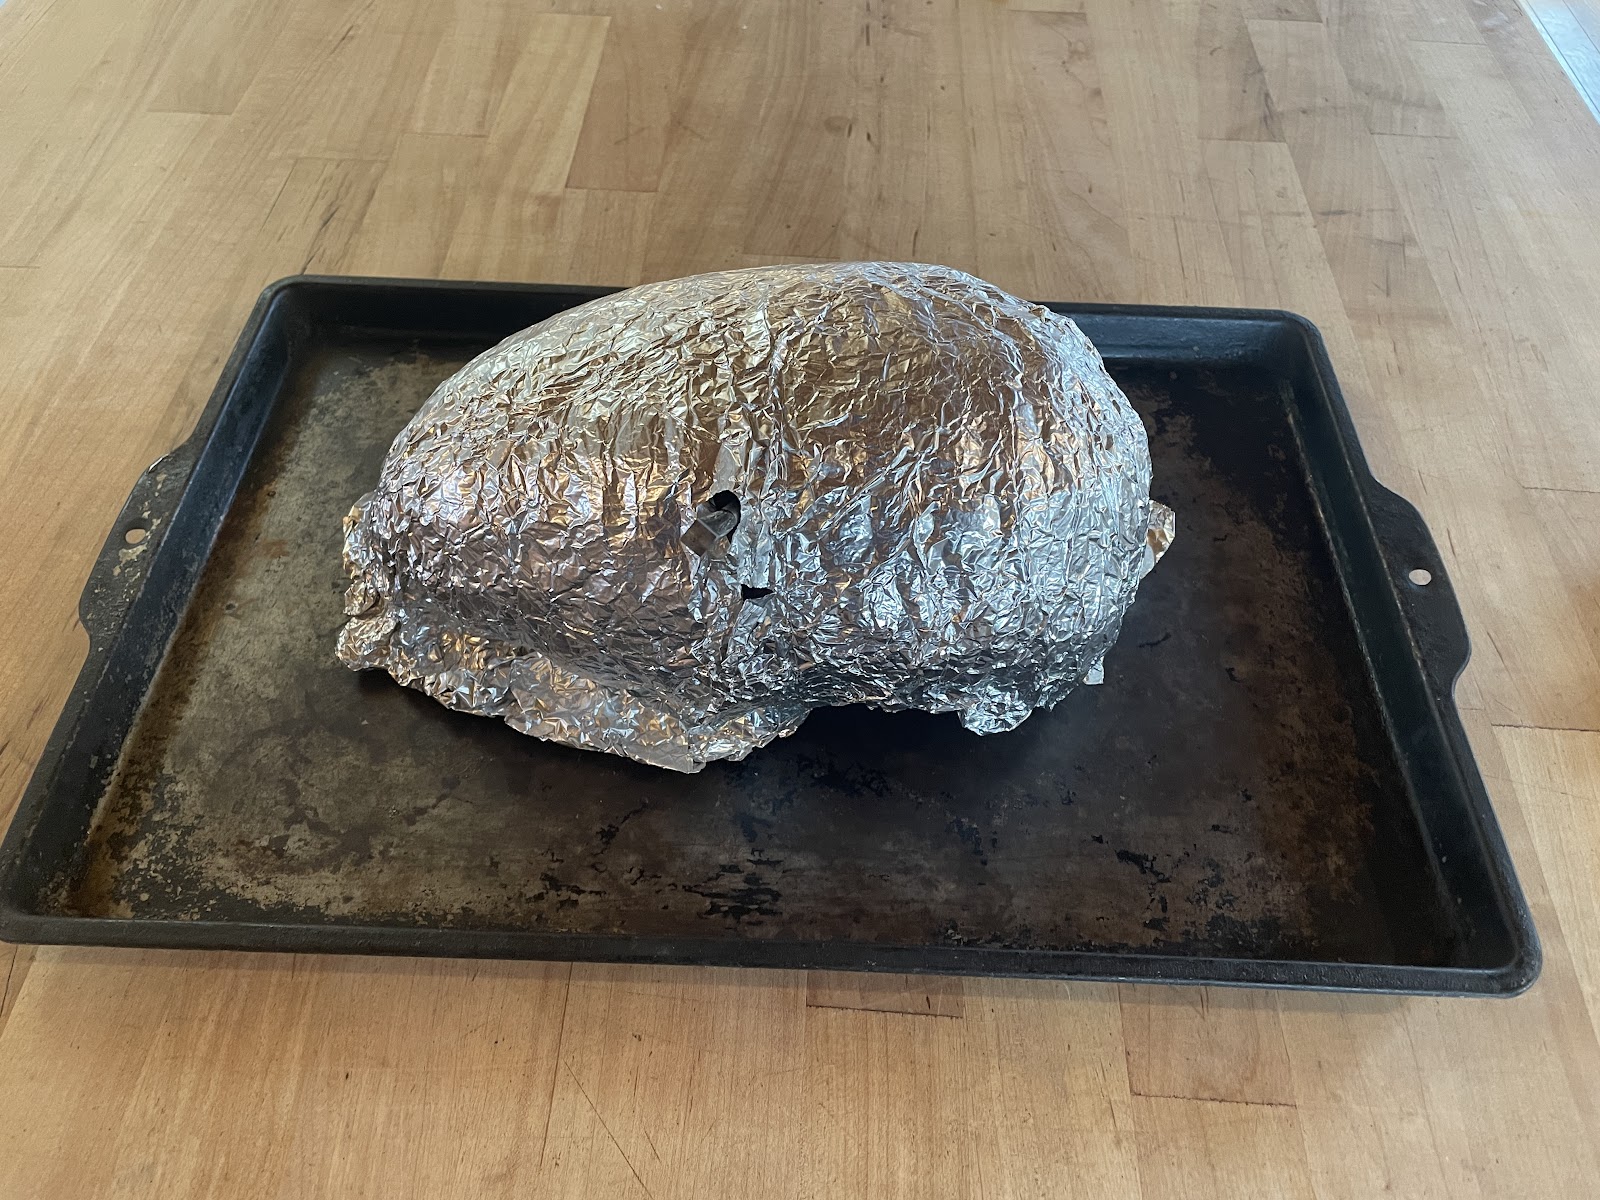
- Wrap the roast in tin foil and place on a baking sheet. (I found very little liquid was released and the cookie sheet with low sides worked just fine)
- Cook the ham in the oven for approximately 15-20 minutes/lb.
- Remove the ham when internal temperature reads 100-110F.
- Let rest for at least 30 minutes.
- Slice and serve
Looking ahead to Easter…I thought we would have plenty of Ham Roasts available for the easter holiday, however we only have 10 left in stock.
Consider ordering your No-Nitrate Smoked Ham Roast soon to make sure you have one for Easter 2024!
Farm Updates
As we approach the new year I look forward to sharing with you a review of 2023 and all that we learned. As well as what we have planned for 2024. Stay tuned!
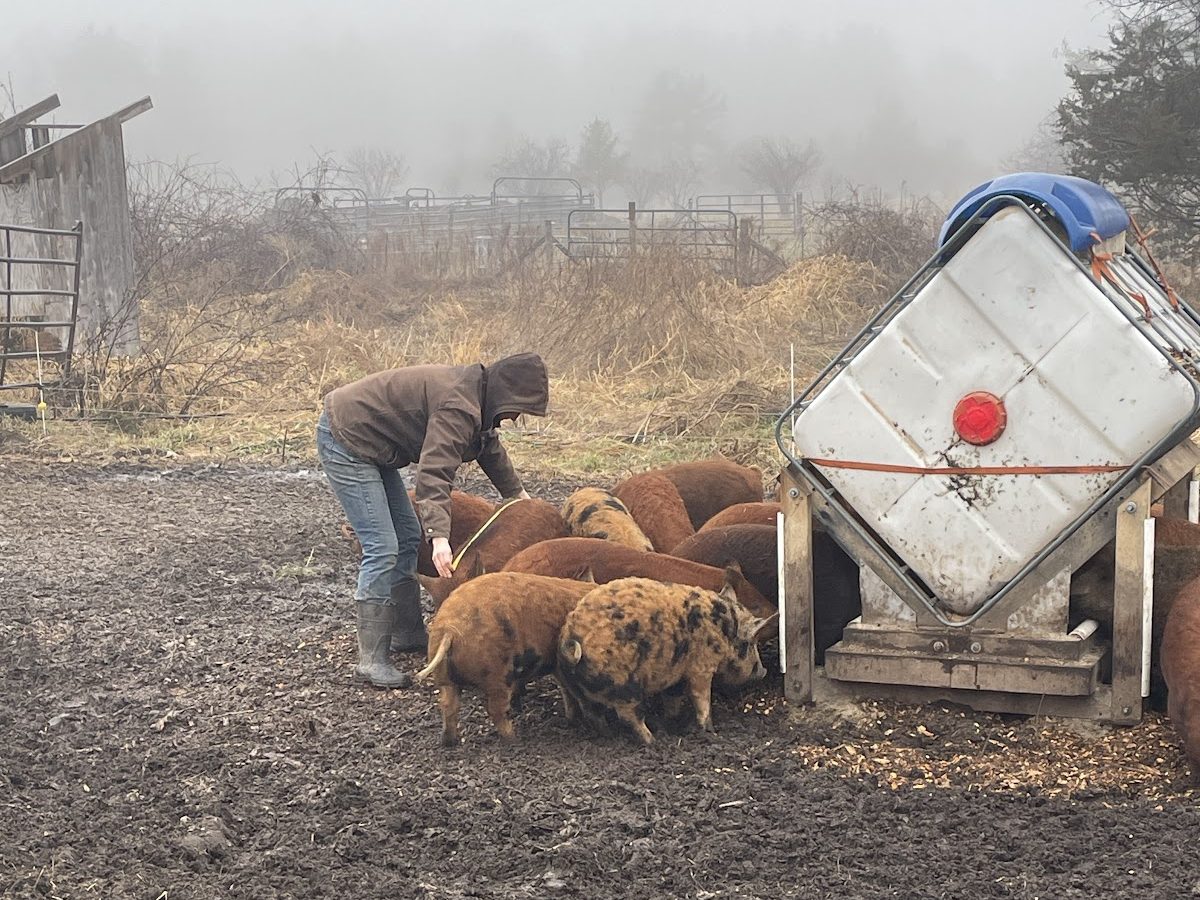
For late December it has been unseasonably warm and wet. We had a massive rainstorm that washed out roads and saturated the thawing ground. We rely on the ground to freeze in late December to keep our pigs happy in their winter paddock. This year has us reconsidering how we manage our winter group of pigs, and to perhaps extend their pasture rotation.
One of the benefits of having Lewis and Lovett train the pigs to a good belly rub is that Racey can start measuring them every 2 weeks. Using a simple sewing tape, we measure the pigs heart girth (just in the divet between the front legs and where the belly drops) and length (from the base of the ears to the base of the tail).
(Hearth Girth 2 x Length) ÷ 400 = live weight of pig
We use this information to track weight gains, which then helps us determine if we’re on track for our slaughter dates and how batches compare to previous pigs.
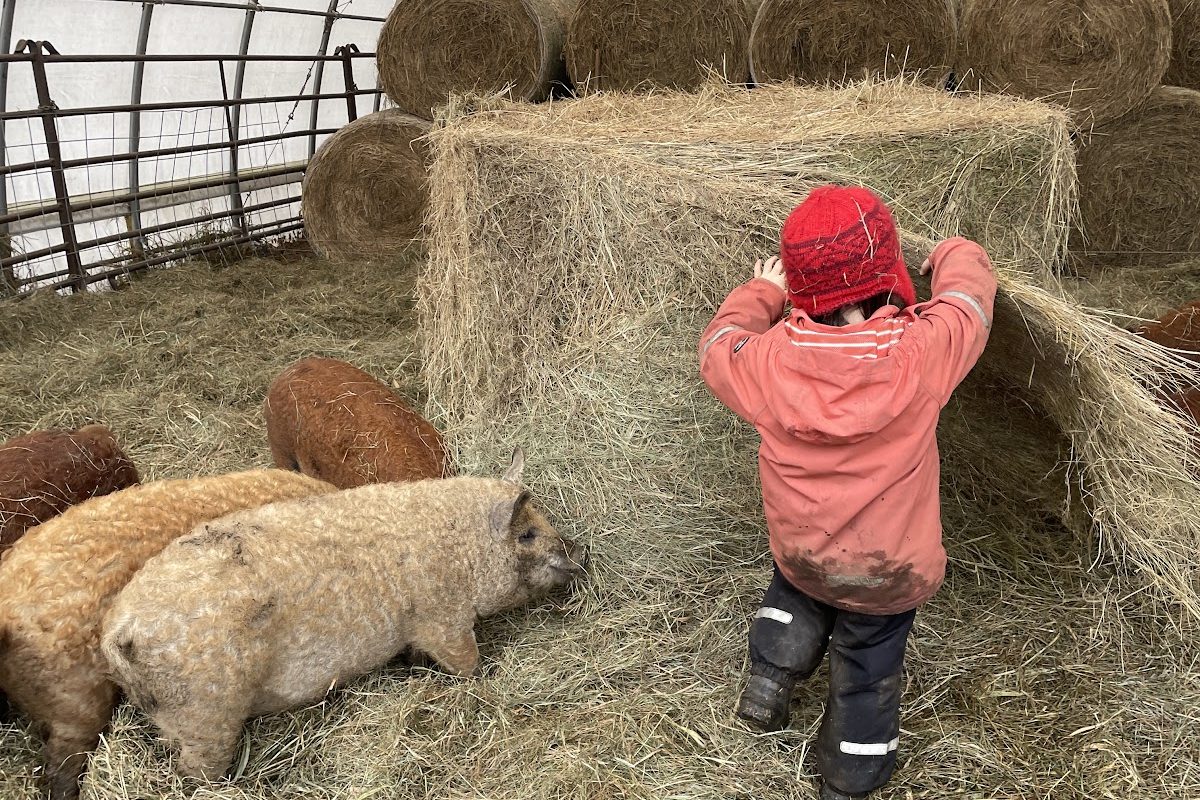
Lovett loves the pigs and helped me get down a bale and spread out some hay.
Happy New Year!
